Keeping your WordPress site secure starts with regular updates. However, to further strengthen your defenses, implementing a security plugin is extremely effective.
Among the many available options, one of the most popular and proven choices is Wordfence Security. In this article, we’ll focus on the free version of Wordfence and walk through five essential security settings you should configure right after installation—without getting lost in complex configurations.
Note: Wordfence is frequently updated, and its UI may change over time. This article is based on information as of March 2026. If there are discrepancies, please prioritize what you see in your actual dashboard.
1. Optimize and Enable the Firewall (WAF): Your First Line of Defense
One of Wordfence’s most important features is its Web Application Firewall (WAF). It acts as a gatekeeper that detects and blocks malicious traffic before it reaches WordPress.
To maximize its effectiveness, make sure to optimize the firewall immediately after activation.
- Go to “Wordfence” > “Firewall” in the WordPress admin menu.
- Click the button or notice that says “Optimize the Wordfence Firewall.”
- Select your server type (usually auto-detected, e.g., Apache + htaccess) and click “Continue.”
- Important: You will be prompted to download backups of your
.htaccessor.user.inifiles. Download and store them safely. - Once completed, click “Close.” The firewall should now be in Extended Protection mode.
Then check the firewall status:
- Learning Mode: Used temporarily after installation or when adding new functionality. Do not leave your site in this mode after launch.
- Enabled and Protecting: This should be your normal state. It actively blocks malicious traffic based on learned behavior and rules.
Note: In the free version, firewall rules are updated with a 30-day delay. Premium users receive them instantly, but even the free version provides strong baseline protection.
[capbox title='Tip' titlecolor='#fff' titlesize='98%' titlepos='left' titleicon='icon-attention' titlebold='1' titlepattern='1' bdsize='3' bdstyle='solid' bdcolor='#27a7c6'] Do not leave your site in Learning Mode for more than a week. If you do, even malicious behavior may be learned as “normal,” creating a critical security risk. Always switch to Enabled and Protecting. [/capbox]2. Login Security: Protect Against Brute Force Attacks
One of the most common attacks on WordPress is the brute force attack targeting the login page. Wordfence provides powerful tools to prevent this.
Go to “Wordfence” > “Login Security” (or “Firewall” > “Brute Force Protection”).
Make sure the following settings are configured:
- Enable brute force protection: Ensure it is checked.
- Max login attempts: 5–10 attempts recommended.
- Password reset attempts: 3–5 attempts.
- Lockout time frame: 5 minutes to 1 hour.
- Lockout duration: 1–4 hours.
- Immediately lock out invalid usernames: Must be enabled.
- Force strong passwords: Recommended for admins and editors.
Additionally, the most effective protection is Two-Factor Authentication (2FA).
This requires a one-time code from apps like Google Authenticator or Authy, and is available even in the free version.
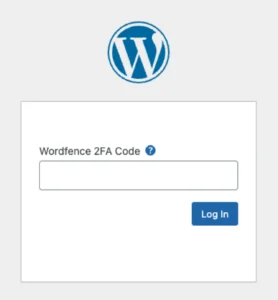
Set it up under “Login Security” > “Two-Factor Authentication.” At minimum, enable this for administrator accounts.
3. Malware Scanning: Your Site’s Health Check
This feature checks whether your site has been tampered with or infected with malware.
Go to “Wordfence” > “Scan”:
- Scan Scheduling: Ensure it is enabled for automatic scans.
- Scan Type: “Standard Scan” is sufficient for most sites.
If a Critical issue appears, do not ignore it. It may indicate modified core files, suspicious code, or malware. If unsure, consult a specialist immediately.
[capbox title='Real Case' titlecolor='#fff' bdcolor='#27a7c6'] In one case, a client’s site showed modified plugin files. Investigation revealed an intrusion via an outdated theme vulnerability. Thanks to Wordfence alerts, we were able to recover before serious damage occurred. [/capbox]4. Email Alerts: Detect Issues Early
Wordfence can send email alerts when important security events occur, enabling quick response.
Go to “Wordfence” > “All Options” > “Email Alert Preferences.”
- Email address: Ensure it is actively monitored.
- Recommended alerts:
- Critical issues detected
- IP address blocked
- Login lockouts
- Admin login (optional)
- Wordfence disabled
- Wordfence updated
Adjust settings based on your operational needs.
[capbox title='Operational Tip' titlecolor='#fff' bdcolor='#27a7c6'] Too many alerts can lead to “alert fatigue.” Optimize notifications so you don’t miss critical warnings. [/capbox]5. (Bonus) Use the Wordfence Dashboard
Regularly check the Wordfence dashboard to monitor:
- Blocked attacks
- Failed login attempts
- Scan summaries
This helps you stay aware of your site’s security status.
2026 Standard: Balancing Security and Performance
A common concern is that security plugins slow down sites. However, being attacked and having resources consumed is far more dangerous.
If performance is an issue, combine security with optimization strategies such as image optimization and selective resource loading.
Extra: Hide the Login URL
Wordfence is powerful, but it does not change the login URL.
Using a lightweight plugin to hide the login URL adds an extra layer of protection:
- WPS Hide Login: Simple and widely used
- Easy Login URL: Minimal and focused
- Secure Login URL Hide: Lightweight and clean design
This creates a two-layer defense: firewall + hidden entry point.
Summary: Even Basic Settings Make a Big Difference
By configuring these five essential settings, your site’s security improves dramatically compared to doing nothing.
While Wordfence has many features, starting with these basics provides strong protection.
Most importantly, do not rely solely on Wordfence—keep WordPress core, plugins, and themes updated, and maintain regular backups.
At Edel Hearts, we provide setup support and advanced WordPress maintenance services, including 24/7 monitoring.
If managing security feels overwhelming, feel free to contact us anytime.