What Is the “Font Library” Introduced in WordPress 6.5?
One of the most notable features released in WordPress 6.5 (March 2024) is the long-awaited Font Library. This feature makes it significantly easier for WordPress users to manage fonts across their entire site—without relying on additional plugins.
Tasks that previously required plugins or custom code—such as integrating Google Fonts or uploading custom fonts—can now be handled as part of WordPress core. This represents a major step forward.
In this article, we’ll explain how the Font Library works based on its initial release in WordPress 6.5, along with additional insights gained since then. In particular, we’ll emphasize an important concept: using only the minimum necessary fonts to avoid performance degradation caused by excessive font loading.
Why Is the Font Library Important?
Fonts have a significant impact on a website’s brand identity, readability, and overall user experience. Before WordPress 6.5, customizing fonts typically involved one of the following approaches:
- Using limited font options provided by the theme
- Writing custom CSS to implement web fonts
- Installing plugins to manage fonts
Each of these methods had drawbacks. Theme options were limited, custom CSS required technical knowledge, and plugins introduced dependencies and potential performance issues.
The Font Library in WordPress 6.5 addresses these challenges and provides the following benefits:
- Simplicity: Easily add and manage fonts without technical knowledge
- Performance: Optimized font loading improves site speed
- Privacy: Local hosting of Google Fonts enhances user privacy
- Consistency: Unified typography across the entire site
- Reduced dependencies: No need for font management plugins
Basic Usage of the Font Library
Getting started with the Font Library in WordPress 6.5 is straightforward. However, at the time of release, this feature was primarily designed for block themes. It was not easily accessible in traditional (classic) themes.
Since then, Gutenberg has expanded support for classic and hybrid themes. However, actual availability still depends on your WordPress version, whether the Gutenberg plugin is installed, and your theme structure. Always verify functionality in your own environment.
How to Access the Font Library
- From the WordPress dashboard, go to “Appearance” → “Editor”
- Click the “Styles” icon in the top right
- Select “Typography”
- Click “Manage Fonts”
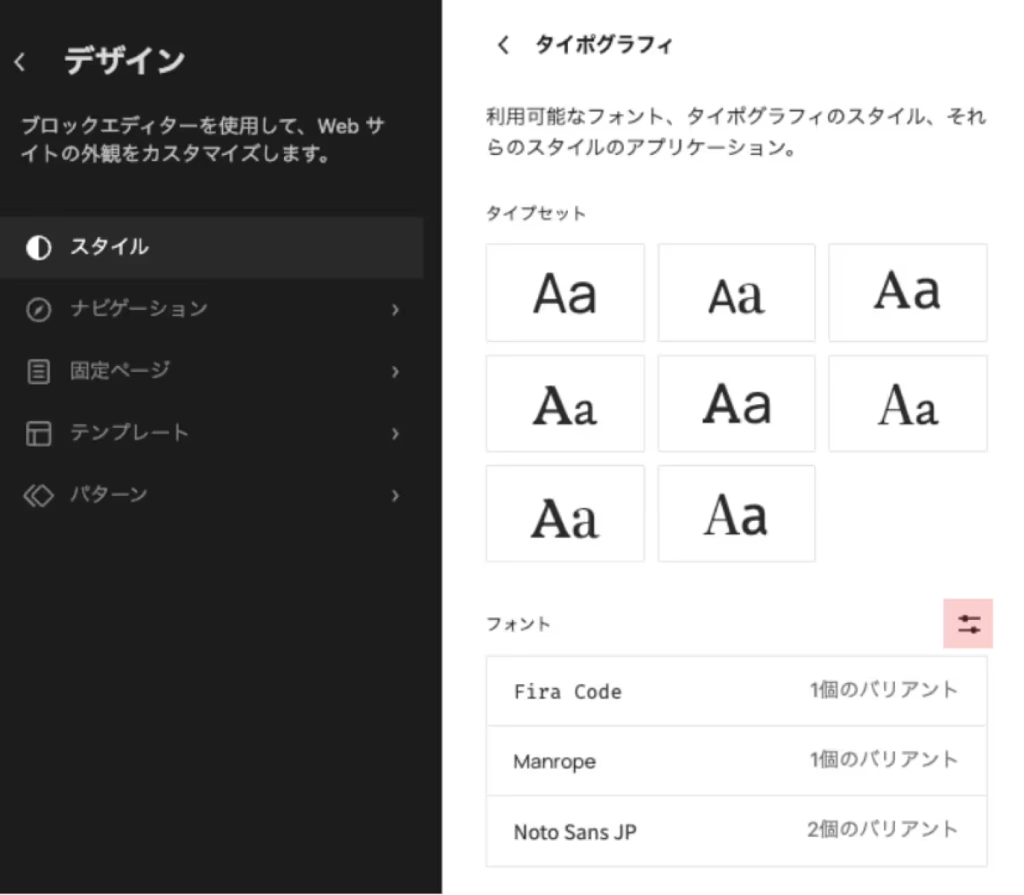
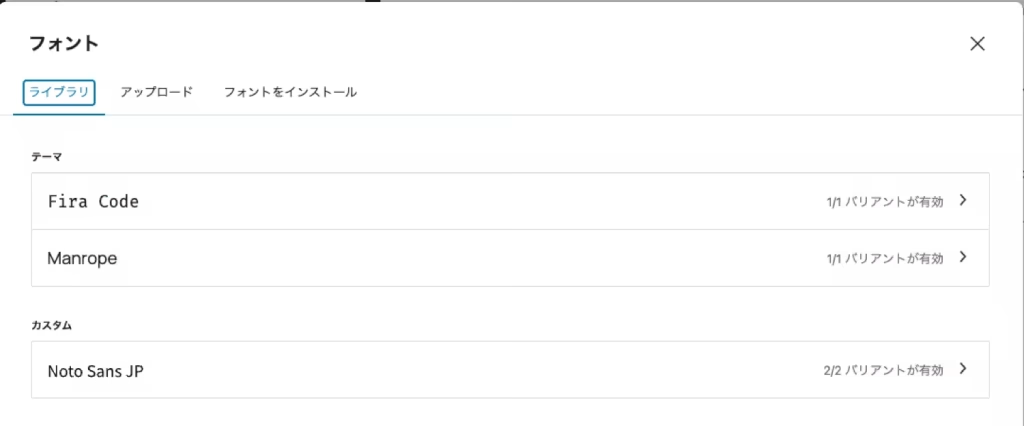
This opens the Font Library management interface, where you can view installed fonts, install new ones, and remove unused fonts.
What You Can Do with the Font Library
The WordPress 6.5 Font Library allows you to perform three main actions:
| Feature | Description | Example Use Case |
|---|---|---|
| Add Google Fonts | Select and install from a large collection of Google Fonts | Use “Montserrat” for headings and “Open Sans” for body text |
| Upload Local Fonts | Upload purchased or custom fonts | Apply a corporate brand font across the site |
| Manage Font Application | Assign fonts to headings, body text, and other elements | Different fonts for H1–H6, paragraphs, and buttons |
How to Add Google Fonts
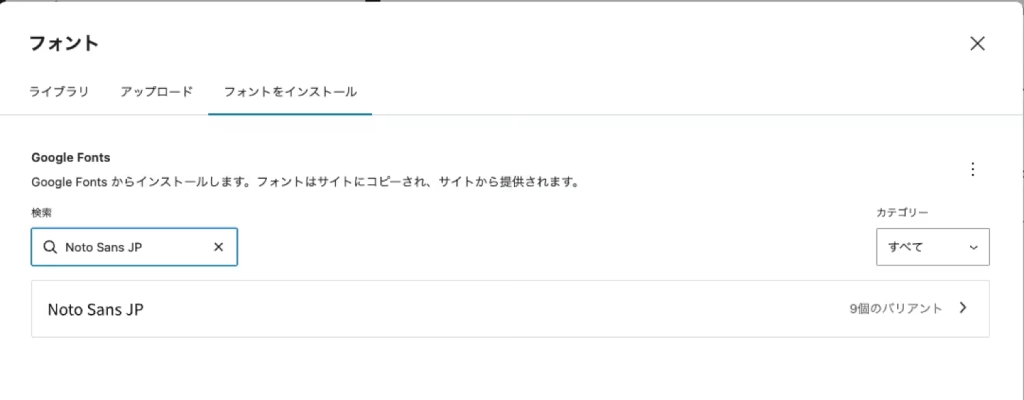
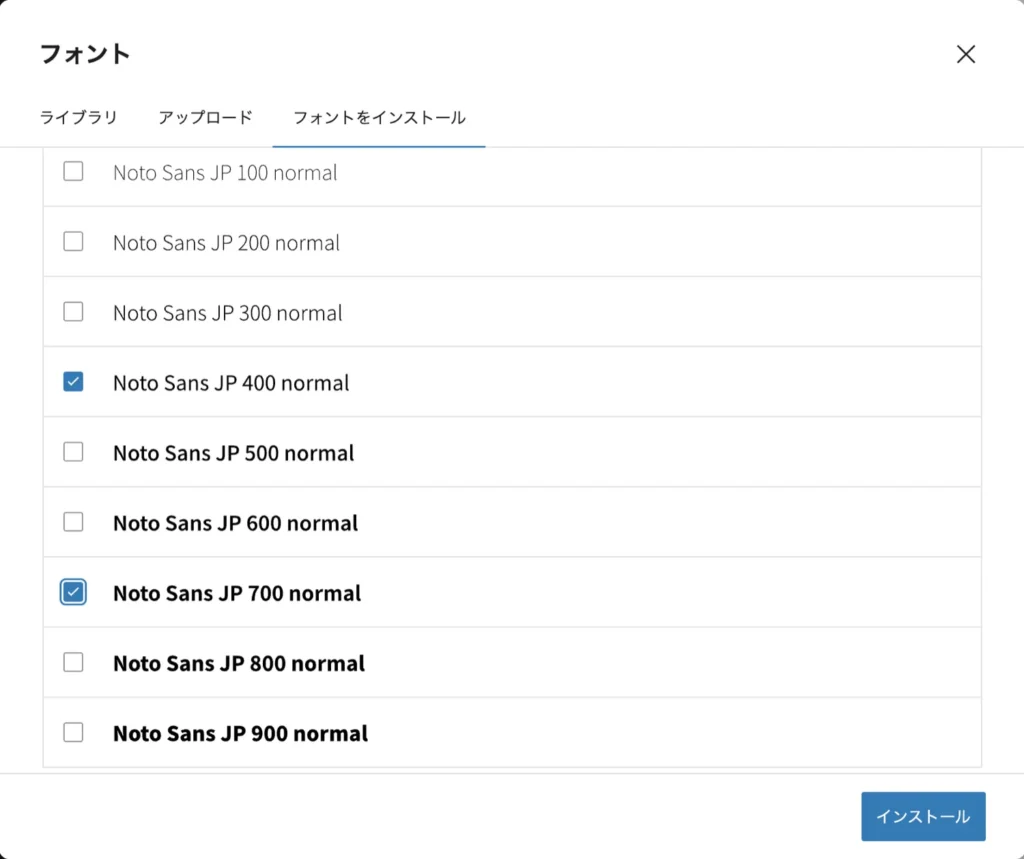
Google Fonts are widely used due to their variety and free availability. To add them via the Font Library:
- Open the Font Library and select the “Install Fonts” tab
- Click “Allow access to Google Fonts”
- Search for a font or browse by category
- Select a font
- Choose weights (thickness) and styles (e.g., italic)
- Click “Install”
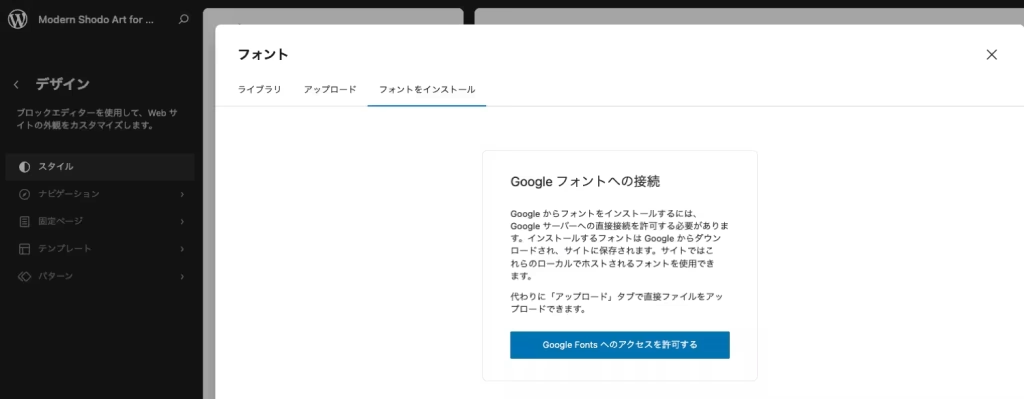
Installed Google Fonts are stored locally rather than loaded from external CDNs. This reduces external requests, improves privacy, and can enhance performance and stability.
Tips for Choosing Google Fonts
- Prioritize readability, especially for body text
- Select fonts with multiple weights for flexibility
- Ensure language support, especially for Japanese content
- Limit font weights to avoid performance issues
How to Upload Custom Fonts
To use proprietary or commercial fonts:
- Open “Install Fonts” in the Font Library
- Select “Upload Fonts”
- Click “Add New Font Family”
- Enter a font name (e.g., “Corporate Brand Font”)
- Upload font files (.woff2, .woff, .ttf, .otf)
- Set styles and weights
- Add additional files if needed
- Click “Save”
Whenever possible, use .woff2 format. It is generally smaller and more performance-friendly than .ttf or .otf.
Important Considerations
- Check licenses for web usage rights
- Minimize file size
- Limit character sets for large fonts like Japanese
- Ensure accurate font naming
Applying Fonts Effectively
After installing fonts, apply them site-wide using Global Styles:
- Go to “Appearance” → “Editor” → “Styles”
- Select “Typography”
- Configure:
- General (default site font)
- Headings (H1–H6)
- Paragraphs
- Select fonts from installed options
- Adjust size, line height, and spacing
Advanced Techniques
- Apply fonts per block type
- Combine with color variations
- Create style variations
- Use responsive font sizes
Limit Fonts to Maintain Performance
While the Font Library is powerful, adding too many fonts is not recommended.
Recommended Setup
- 1 font for body text
- 1 additional font for headings (if needed)
- Minimal weights (Regular, Bold)
This typically means 1–2 font families and 2–4 weights.
Avoid These Patterns
- Different fonts for body, headings, buttons, and decorations
- Installing all weights (100–900) unnecessarily
- Adding multiple Japanese font families
Best Practice Workflow
- Choose one body font
- Add one heading font if needed
- Limit weights
- Prefer
.woff2 - Check performance using PageSpeed Insights
Fonts are not “better when more”—they are more effective when used intentionally and minimally.
Technical Aspects
Performance Optimization
- Local font management reduces external dependencies
- Centralized control improves maintainability
- Easier removal of unused fonts
- Supports lightweight configurations
Developer Features
- Custom font sources
- Programmatic font control via PHP
- Custom loading strategies
- Theme integration
// Customize font directory
add_filter( 'font_dir', 'my_custom_font_directory' );

// Font collection filters
add_filter( 'rest_wp_font_family_collection_params', 'my_font_family_params' );
add_filter( 'rest_prepare_wp_font_family', 'my_prepare_font_family' );
Limitations
- Primarily for block themes
- Limited file format support
- Partial support for variable fonts
- Performance impact if overused
- Potential conflicts with existing font settings
Summary
The WordPress 6.5 Font Library revolutionizes typography management by enabling advanced font control without plugins.
- No plugin required
- Local Google Fonts improve privacy and performance
- Easy custom font uploads
- Consistent typography across the site
However, in practice, success depends on restraint. Start with a minimal setup and expand only as needed while monitoring performance.
At Edel Hearts, we provide WordPress customization support, including font optimization strategies. Feel free to contact us if you need assistance.